Tuesday, August 31, 2021

Cat, Skull, & Pumpkin

      This first card for September (I have a total of 4 posts today!) is doing double duty for both Paper Funday and for Jan's Digi Stamps.  Although Jan's Digi Stamps is still on a break from their own challenges, they are sponsoring Paper Funday this month.  They will start their monthly challenges again in November.

     For Paper Funday, our September theme is "Autumn/Fall" and I chose to do a Halloween card which features autumn colors.  I merged images from three of Jan's sets; the black cat (reversed) is from a new set called "Pumpkin People," the skull is from "Hocus Pocus," and the pumpkin is from "Autumn Corn Sheaves."  All of them are secondary images to the main image in each set.  The sentiment is from the new Pumpkin People set.

     I colored with ProMarkers, then used my Fiskars paper cutter to cut the image square.  I inked the edges with a marker, added polka dot washi tape diagonally across two corners, and tied a double-loop bow from satin ribbon.  The card front was embossed with my "Linen" EF.  


     Challenges:

     Come play in our 'Autumn/Fall' challenge at Paper Funday this month and check out what some of the Jan's DT have done in the interim before the challenges begin again in November.  Jan's Digi Stamps.

      Happy Crafting.  NanaConnie

Thursday, August 26, 2021

Hard Days Knight

    We're starting a new weekly challenge over at Creative Knockouts and our theme this week is "Funny Cards."  Our fun sponsor is Dr. Digi and they provided images for the DT to use on our sample cards.  I used an mage called "Hard Days Knight" and I think the brief, one-word sentiment says it all.  :-D  You do need to look closely and check out the knight's lance.  The poor dragon can't even read his morning newspaper in peace.  I'm sure the knight was trying to impress a fair lady but I doubt he succeeded.

     I colored with my ProMarkers, then cut the image with a Gina Marie die.  I used my Linen EF on the blue, CS background and found a scrap of starry night dp in the basket.  The addition of sparkle twine was all the card needed to look finished.


     Challenges:

     That's all for today.  Edited to add: I'm still suffering from the after effects of my second COVID vaccine (but marginally better - the nausea has stopped) so I'm squirreled away under the sheets for at least another day or two.  
     
     Happy Crafting.  NanaConnie

Monday, August 23, 2021

Gnome's Wild Flower

      First, quick apology for the late post.  Unavoidable.  :-(

     Today we start another new challenge at Pammie's Inky Pinkies and our theme is "Anything Goes."  Our challenge is sponsored this week by SheepSki Designs and they provided images to the DT for our inspiration projects.  Thank you, SheepSki!    

     I used one of Andrea's adorable Gnomes and this one is called "Wild Flower."  I colored him with my ProMarkers, and used a QuicKutz die to cut both the image and the blue frame around it.  I added a scrap piece of pale blue CS behind the image but there's a secret I'll share with you.  The background dp is actually 2 pieces which I carefully matched together and the image and blue CS are covering up a 'hole' in one piece where a piece had been cut for some other project.

     I keep saying, "Don't toss the scraps!  They can be used."  :-D

     I added one of my signature, hand-sewn bows which had been 'dyed' with ProMarker to match the flowers.  The sentiment was printed and cut with an Avery Elle die.


     Challenges:

     We really want to see you playing in our challenge this week.  Remember, "Anything Goes" and all you have to do is submit them with the link up tool on the challenge blog.  :-D  Happy Crafting.  NanaConnie

Sunday, August 22, 2021

Appropriate Dress Code

      We've all gotten so used to hanging out at home over the last year or so that most of us have completely forgotten about things like dress codes.  It's just so easy to stay completely casual.  Let's face it, even with Zoom calls, one can dress the top half and stay in jammies on the bottom.  

     This gentleman, an image for the progressive challenge at Kinda Cute, seems to have developed a new definition of "Business Casual" dress during the pandemic.  I do hope he's not at the office!  :-D

     I colored with ProMarkers, cut both the image and sentiment with CUTplorations dies after adjusting them for a second cut to get the shape and size I needed.  I used sky blue CS for the card base and added silk twine before putting on the image and sentiment pieces.  I kept it very CAS because I intend to use it for a masculine birthday card.


I took the sketch from The Outlawz,
turned it 1/4 turn, and used the twine in place of the chevron border.
     Hope your weekend has been wonderful.  Happy Crafting.  NanaConnie

Saturday, August 21, 2021

Confirmation

      This lovely little image is from LeAnn's World and is for their Progressive Challenge.  I'm sure she was meant to be a bride but since I needed a confirmation card, and since she can easily pass for a young girl, she graces the front of this very CAS card.

     Colored with my ProMarkers, then cut with a Cuts stitched die.  Sentiment printed and cut with an Avery Elle die.  Edges of both die cuts inked with gold inkpad.


     Challenges:

     Happy Crafting.  NanaConnie

Friday, August 20, 2021

Another Dance Day

      Did you enjoy my week long break from cards influenced by a dance theme?  I hope so because I'm back to dance cards today but these are a bit different from the Ballroom style.  Today we celebrate good old West Coast Swing and Boot Scootin' !  :-D

     There's also no coloring on either one of these which is extremely unusual for me.  Instead, I dug out a never-before-used die from Die-namics.  I bought this die probably three years ago when my daughter was teaching West Coast Swing dancing.  I wanted to do some cards for her and her dance group but shortly after I got it, she had an injury and couldn't dance for many months, probably as much as a year, and then the pandemic closed in.

     Now I'm finally using the die and made these two cards, the first of which I'll give to her.   On the card with the white background, I cut the silhouette from a scrap of black CS, added the color by trimming tiny scraps of red and blue CS and attaching them to the back of the silhouette.  The sentiment was printed, fussy cut, framed, and fussy cut again.    For the red card, I cut the dancers from  brown CS, mounted them onto a scrap of red CS, made a lariat using red jute cord, then printed and cut the sentiment with a die from Avery Elle.

     Both are CAS designs, good for either male or female.  I chose the red and blue because red is my favorite primary color and, when mixed with blue, it makes purple, which is my favorite color of the entire color wheel.  IN addition to that, either red or blue will work on masculine cards as well as feminine ones.


     Challenges:
    (Card #1)

    (Card #2)

     Happy Crafting.  NanaConnie

Wednesday, August 18, 2021

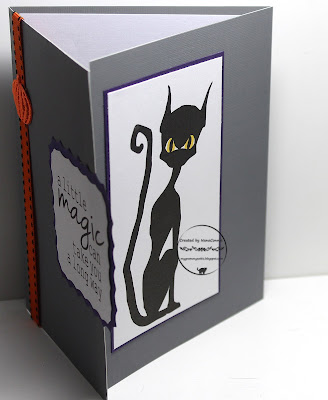
A Little (Halloween) Magic

      This is my second card for the August monthly challenge at Beccy's Place, where the theme is always Anything Goes but where there is also an optional theme which you can use if you desire.  This month, Beccy gave us a Coin Flip chart.  For each line across (1 - 5), you flip a coin and then you use the item listed under either Heads or Tails depending on how the coin landed.


I ended up with: Stitching/Gate fold/Digi image/Ribbon/& Other occasion.

     I chose a sentiment and a digital image from two different Beccy's sets.  The cat is "Hemlock" from 'The Witching Hour' and I can't remember the name of the set for the sentiment.  I looked for it and didn't find it but it may have been retired.  
 
     Hemlock's eyes were colored with a ProMarker, and he was cut with a QuicKutz die.  The sentiment was also cut with a QuicKutz die from a different set.  Both were framed with CS cut with dies one size larger.  My stitching is on the ribbon I used and I added a small, fabric pumpkin.  I folded my card into a modified gate fold with overlapping flaps.  


     Challenges:

     Have yourself a wonderful day and Happy Crafting.  NanaConnie

Tuesday, August 17, 2021

A Pretty Calf for a Lovely Thank You

      I noticed the other day that my stash of  Thank You cards was getting pretty low and, just in time, this DOTM showed up from Imagine That!  Along with the sweet calf image, there are sentiments and one of them was perfect for adding to my stash of Thank You cards.  :-D

     I colored with ProMarkers and gel pens, then cut the image with a die from Tattered Lace.  The die is actually made for cutting a shaped card so it has a blank space at the top without any cutting, but after cutting once, I turned the piece in the die and cut a second time so that I had a complete circle.  

     The sentiment is cut with an Unbranded die and the bottom corner of the flocked paper was cut with a Poppy Stamps die.   The corner die also embosses but that doesn't show up very well on the flocked paper.   I used a craft knife to distress the edges of the flocked paper but it's very heavy paper and the distressing doesn't show up very well in the photo.  I didn't want to cover any more of that gorgeous Doodlebug paper so I let the design and the die cuts be their own embellishment.


     Challenges:

     Hope your week is going well and that you can find some 'down time' just for you.  :-D  Happy Crafting.  NanaConnie

Monday, August 16, 2021

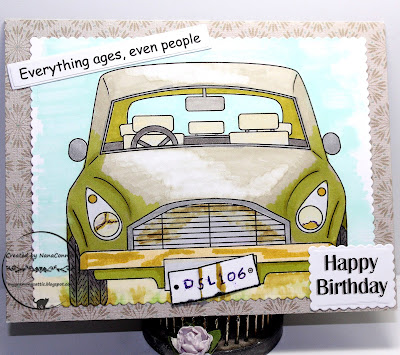
Everything Ages

      I have to do a little explaining about the image I used for today's card.  It came from Twinkle Lane Designs and it's the freebie image for the progressive challenge at The Outlawz this month.  The image is called "New Car" and my car is definitely not colored to look anything like a new car.  

     But I wanted to use it as a masculine birthday card for one of the 'older' males in my family and I really didn't want him thinking the card would be a promise of a new car as a birthday gift!  :-D  So, my apologies to the artist who intended the car to be bright and shiny and sparkling.  

     I had intended to reverse the image before I printed it so that it would look more like an old, American, left-hand-drive, car and not quite so British but I simply forgot about flipping it.  Sigh... as we age, the memory goes.  I'm told the memory goes second but I can't remember what goes first.  lol

     I used my ProMarkers to color the image and I cut it with a die from Tonic Studios.  The image came with sentiments (one of which I used - the Happy Birthday part) as well as some add on features.  I printed the extra license place, fussy cut it, 'bent' it, added a bit of rust, and glued one corner to the car so that it appeared to be falling off.

     The card base is an old one I had in my stash from the "Linen Closet" collection by DCWV.  The first part of the sentiment (which is my own and is at the top of the card) was printed and cut with an Avery Elle die.  Because I'm using it as a masculine birthday card, I added no embellishment other than the bent license plate which actually gives a bit of 3D texture.


     Challenges:

     Happy Crafting.  NanaConnie

Sunday, August 15, 2021

Coffee and a Muffin

      This is my second post today so feel free to scroll down and check out the first one.

     We're mid-way through our August challenge over at Your Scrapbook Place  and I'm using the other 2 images which are the prize from Bugaboo Stamps this month.  Check out my first card (at this post) if you want to see the third image of the prize.  You may know that the Bugaboo Stamps store closed unexpectedly but we are still offering a prize of the three images Bugaboo gave to the DT for this challenge.  So sad that Bugaboo closed.  :-(

     I merged the images before printing and coloring them.  I colored with my ProMarkers and then cut the image with a complex die set from Sue Wilson.  That same die also embosses the frame part of the cut.  I used my 'Linen' EF on both pieces of CS, aqua and lavender.  I backed the cut image with the aqua CS an the purple CS strip went behind the image.  The die cut is so detailed that I allowed it to be the 'embellishment' on the card.


     Challenges:
Inspiration Station  (great range of colors!)

     You still have a little over 2 weeks to play in our Anything Goes challenge this month so get something made and come play with us.  Happy Crafting.  NanaConnie

Pin Up Girl?

      It's the 15th of the month and the day that a new challenge starts at QKR Stampede.  This challenge will run through the end of the month and the next one starts on the 1st of September.

     The image I used on my DT card is one that has been recently used by at least three of the DT members.  It seems that when the first gal used it, we all fell in love with the total silliness of it and decided to do our own versions of fun and playful cards.

     The image is called "Momma Snake" but I thought she looked more like one of those glamorous WWII pin up girls.  lol  I colored her with my ProMarkers and fussy cut her.  Then I mounted her onto a rectangle which had been cut it with a Die-namics stitched die.  Both of the background papers are from the Recollections 'Bright & Basic' stack.  

     The sentiment is printed and cut with an Avery Elle die.  I added one of my signature bows and called it finished.  Pretty CAS even if the "white" space is dp.  :-D


I took inspiration from the color wheel at
used opposites of Red and Green.


     Challenges:

     Be sure to check the main challenge post on the QKR Stampede blog to see the winners of the last challenge, and while you're there, take some inspiration from the DT, then come play in our "Anything Goes" challenge.  Happy Crafting.  NanaConnie

Saturday, August 14, 2021

Chasing Skunks

      Most animals have an instinct about what's dangerous or unpleasant, even when they're too young to have actually encountered the danger.  But some youngsters have to push the envelope and learn for themselves.  That's clearly what happened to this young ginger kitten.  Fortunately, he has friends who love and care for him.  :-D

     House Mouse image colored with ProMarkers and cut with cross-stitch die from Unbranded dies.  All the papers are scraps from the basket and I know the papers with the rows of dots came from Lawn Fawn.  The sheer ribbon is from Really Reasonable Ribbon and the sheer bow is one of my signature, hand-sewn bows with a pearl.  The sentiment was printed and cut with a die from Avery Elle.


I was inspired by Sketch #213 at Sweet Sketch Weds.
adjusted for an A2 card.


     Challenges:

     That's all I have for today but I'm heading back to the craft room so who knows what I might have for tomorrow?  Happy Crafting.  NanaConnie

Friday, August 13, 2021

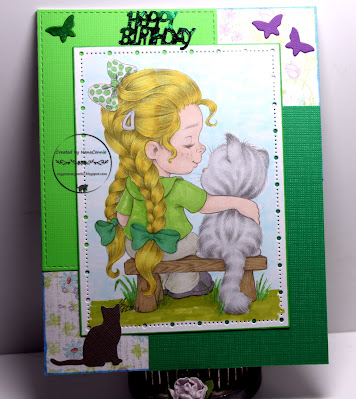
Best Friend's Birthday

      Today I'm sharing another card which features a Mariola Budek image.  She has become one of my favorite artists.  :-D  It doesn't hurt my feelings any when those images have adorable kittens in them.

     This image is in gray scale which makes coloring it an absolute dream!  I used ProMarkers and pencils, then cut the image with a Gina Marie die.  The background is made from scraps that were in the basket of pieces to be either used or tossed and, since the basket was getting full to overflowing, many were going to be tossed.  

     The dark green CS was dry embossed with my "linen" EF.  The lighter green piece was cut with a Memory Box die, used to add a bit of texture from the stitching. The butterflies were cut with the edge of a Spellbinders die and the little cat at the bottom was cut with a Cheery Lynn die.  It's amazing what you can get out of few bits of scrap paper, isn't it?

     The sentiment piece is nothing more than some left over (and rescued) table confetti from a birthday party 3 years ago.


     Challenges:
Butterfly  (Russian green)

         Hope you enjoyed seeing this card as much as I enjoyed making it.  :-D  Happy Crafting.  NanaConnie

Thursday, August 12, 2021

Don't Over-Shop!

      Doing anything for too long without taking a break can be harmful to your health and that includes "Retail Therapy!"  It's time for the start of a new weekly challenge over at Creative Knockouts and this week our theme is "All Stitched Up."  Add stitches; they can be real or faux.  Our fantastic sponsor is the most beloved Hetty Clare and she supplied images for the DT.  I chose "Ladies on a Seesaw" and this card is going to remind me (through an eye-level placement on the craft room door) that taking breaks is a wonderful thing.

     This image was such a perfect opportunity to make the entire card into a scene buy choosing papers which worked for both sky and ground.  I started by coloring the image with my ProMarkers, then cutting it with a die from Cuts.  The die has stitching marks and I enhanced them by using a black gel pen on each stitch.

     Once colored, I chose papers from Recollections (green) and Lawn Fawn (blue) stacks which complimented the colors I used on the sky and ground in the image.  I added a wrap of aqua ribbon and tied a double-loop bow for the top of the card.  I printed and fussy cut the sentiment, and the card was done!


     Challenges:

     Come play with us this week!  You could win a prize from Hetty Clare and we'd love to be inspired by what you make.  :-D  Happy Crafting.  NanaConnie 

Tuesday, August 10, 2021

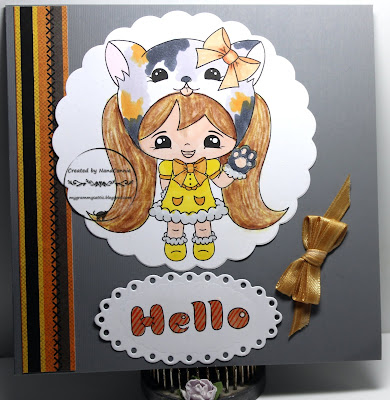
Kawaii Kitty

      This sweet girl in her Kawaii Kitty outfit is the image from the progressive challenge at Stamper's Delights this month.  I used ProMarkers and polychromos pencils to color her, then cut her with a Sizzix die.  The sentiment came with the image and I printed it, cut it with a die from QuicKutz, and added it below the image.

     I used a scrap strip of dp and made a hand-tied, triple loop bow with a left over scrap of satin ribbon.  I ended up with a triple loop bow because the scrap was too long for a double loop and I saw no need to waste the extra ribbon so tied a triple loop bow instead.

     Everything was put onto a gray CS base which was complimentary to the gray in the calico cat's 'fur.'


     Challenges:

     I know this is a really quick post today but I'm up to my ears in things on my plate.  :-D  Happy Crafting.  NanaConnie

Monday, August 9, 2021

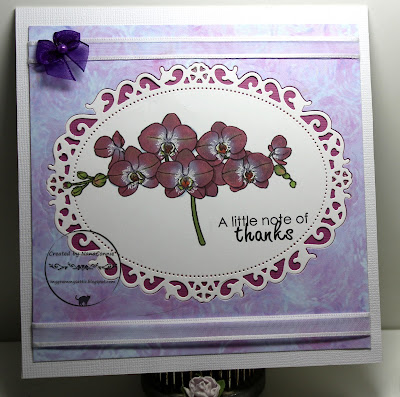
An Orchid Thank You

      I love the way this card developed and the end result.  It features a wonderful "Orchid" image from Beccy's Place. Both the image and the paper I used are on Beccy's list of Freebies on her blog.  You really need to go and check those out.  She has so many wonderful images available there.

     I used ProMarkers ands white gel pen to color the image, then I cut it with a Spellbinders die.  I adjusted the color of the background dp before printing it, then cut it with the same Spellbinders die, and inlaid the image into the background dp.  I added colored CS behind the image so that it would show through the openings in the die cut.  Although it doesn't show very well, there's sparkle gel ink in the small 'circle' shapes of the 4 compass positions on the border of die cut,

     I added two strips of satin-edged, sheer, ribbon and used one of my signature, hand-sewn bows with a pearl.  


     Challenges:

     I hope your week is going well and that the weather isn't too extreme in either a hot or cold direction.  Take some time for yourself and do some Happy Crafting.  :-D  NanaConnie

Sunday, August 8, 2021

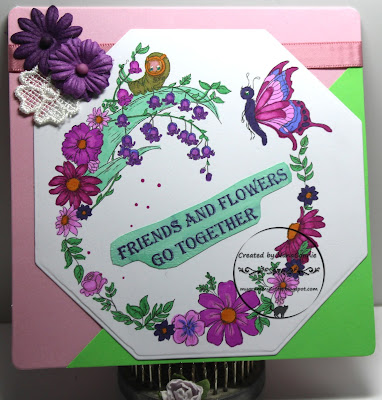
Friends and Flowers

      We're starting a new challenge over a Pammie's Inky Pinkies and our theme is "Anything Goes."  Our marvelous sponsor this week is Lee Holland and the DT received images to use.  I love this "Woodland Floral Border" and the detail on the stamp is incredible!

      I realized recently that when I color with whatever medium, I tend to use just one or two colors with a neutral or two thrown in.  Often my coloring is unintentionally monochromatic.  But I happened to be inspired by both this image and the photo at the Inspiration Station challenge (see below in challenges list) and dug out a wide array of ProMarkers.  Although most of the colors are based on pinks and greens, you'll find blues, purples, even yellow and a tiny splash of light orange.

      Once colored, I cut the image with an octagonal die from QuicKutz.  I used a pink card base and added a diagonal scrap of green CS for the background, then rounded the corners of the card with a Fiskars punch.  The satin ribbon came from the scrap basket, and the flowers (both the white lace and the purple mulberry paper flowers) have been hanging around in the embellishment drawer for a couple of years now.  It was time to use them.  :-D


     Challenges:
Butterfly  (ribbon, Russian green, rose pink)

     I hope you'll think about playing in our challenge this week.  With a theme of Anything Goes, how can you lose?   You might even win some Lee Holland images.  As a side note, I'm just discovering Lee Holland and have fallen in love with the dragons in the shop - all of them!  I've already put a serious dent in my budget this month just THINKING about buying 10 or 20 of them.  lol  

     Happy Crafting.  NanaConnie

The Vienna Waltz

      Are you tired of seeing dance themed cards yet?  I hope not but I will try to give you a break from them for a few days.  :-D  This is the one with the image completely water colored, no markers or gel pens or other inks.  It's also done with lots of my favorite color, purple, but I was definitely inspired by the photo inspiration at Inspiration Station.  

     After water coloring, I let the image dry, then ironed it with my clothes iron.  I always iron on the back side and cover the image with a thin dish towel because water color paper tends to curl when it dries.  I used a medium heat on the iron so as to not scorch the paper.  I let it get completely cold before I pick it up or move it around.  I cut the image with a die from QuicKutz.  The image is framed with another rectangle die cut from white CS.   

     The dp is from Recollections, and I cut the corner with a Memory Box die.  The satin and sheer ribbon is from Really Reasonable Ribbon and I chose it because of the sparkly gold line on each border.  I wanted to emphasize the variety of purples in the image so I chose those two mulberry paper flowers for the upper corner of the image.


     Challenges:
Inspiration Station  (All those lovely color options!  Delicious.)
Three Room Studio

     I promise a few days with no dance themes.  :-D   Meanwhile, Happy Crafting.  NanaConnie

Saturday, August 7, 2021

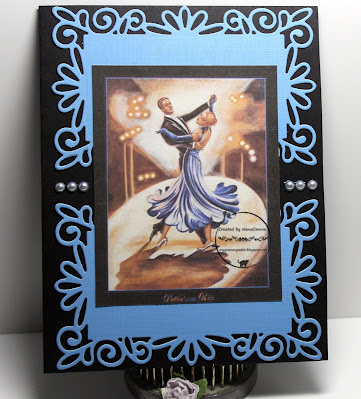
Putting on the Ritz

      One more of my dance themed cards and this is the one I love the best (so far) because I got to use both water color paints and markers.  I'll share another one tomorrow that is all water color and, in its own way, is every bit as glamorous.  :-D  

     On this image, the background is all watercolor, as is the clothing on the couple but their faces, hair,  arms and legs are colored with ProMarkers.  The problem with markers on watercolor paper is that it tends to 'bleed' into spots where you don't want it but when the background is all water color, that can be a blessing in disguise.  The 'lights' were done by putting a tiny brush point of water onto the dried background, then removing the water with another dry brush point, which pulled the color out of the middle, making it look like a floodlight.

     The die cuts were made with a Sue Wilson die and I added the pearls to mimic the floodlights in the image.  The sentiment at the bottom of the frame around the image is so tiny you probably can't read it but it says, "Puttin' on the Ritz."


I chose complimentary colors of blue and rust 
from the color wheel at Color Dare.


       Challenges:

     Happy Crafting.  NanaConnie

Friday, August 6, 2021

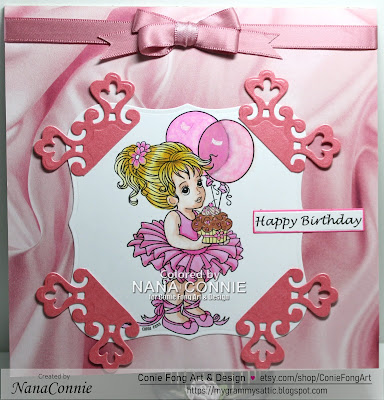
Cake for a Special Birthday

      Today's card features an image from Conie Fong called Abbie with Cake and it's my first DT card for the month of August.  Isn't she adorable?  She just had to be done in shades of pink because she's so perfectly sweet and girly.

     I colored her with ProMarkers and cut the image with a die from Spellbinders.  The 4 corner pieces were originally 2 die cuts (also Spellbinders) which I cut in half and added to the corners of the image.  

     The background is a (very) old piece of scrapbooking paper.  I'm sure it's been in my stash at least a dozen years!  I know it was one of the first papers I ever bought for scrapbooking and that was before I really got into card making.  I started blogging about a year after I shifted over to card making and that was in February of  2011 so that would be 11+ years and it was in the scrapbooking stash for a couple of years before that.

     The satin ribbon and hand-tied, double loop, bow are Really Reasonable Ribbon and have also been in the stash for a long time.  Sentiment was printed and cut with an Avery Elle die, then I inked the edges with marker before applying it to the card.


     Challenges:

     Come play with us this month.  Remember, #Conie Fong has 2 challenges each month on the Facebook page for anyone using a Conie Fong image; one for coloring of images only, and the other for completed projects using colored images.  You can win more of Conie's fabulously cute images!  
     
     Happy Crafting.  NanaConnie

Thursday, August 5, 2021

Dance 'til ...

      A few days ago, I told you about the inspiration I got from seeing a live dance competition and how that resulted in a new batch of cards featuring dance themes.  (See this post for the full story.)  Today, I want to share 2 of the latest dance cards.

     This first one is delightfully romantic and also vintage, reflecting a feel of the 1920s.  The digi image is pre-colored and I found it online after doing a search for "dancers."  There is no way to credit the artist because no information was given about who drew it.  If anyone recognizes it, please let me know and I'll edit this post to give proper credit.

     I'm going to give this to a friend who wants to use this as an Anniversary card.

     I cut the image with a rectangle die from QuicKutz.  I used a Fiskars punch to round the corners, and cut the gold frame with an Unbranded die.  I embossed the frame with my "Linen" EF.  I added no ribbon or bow or gems, feeling that the delicacy of the filigree frame was enough embellishment.


     Challenges:

     This second card was made for the recipe challenge at Crafty Chefs.  That challenge has been reactivated due to the efforts of  Monica of Sunshine Creativity (bless you, my friend!) who has given us a much simplified recipe this month.  Only 2 ingredients: die cuts & a sentiment.

     This is not a challenge for a prize.  It's open to any kind of project providing you use the recipe ingredients, and it's there purely for the fun of challenging ourselves and sharing our results with friends.  If that sound like your kind of challenge, come join the Crafty Chefs on the Facebook page and play along.

     This image was printed on water color paper and I used water color paints to color it.  The background was 'aged' with a beige ProMarker but the text is part of the image.  The pink frames were cut with Tonic Studios dies.  I cut the larger one into 2 pieces and left the 2 diagonal corners slightly open.  The ivy leaves came from a Sue Wilson die and the sentiment was printed and cut with an Avery Elle die.  I used beige CS to make the card base because I wanted an aged look but also wanted contrast with the white leaves and sentiment.


     Challenges:

     That's all I have for today but I still have several more cards with dance themes either made or in process and I'll be posting them off and on over the next two months.  For now, Happy Crafting.  NanaConnie

Tuesday, August 3, 2021

Driving Your Enemies Crazy

      Here it is, time for another new challenge at Paper Funday.  Our theme this month is "Cute Critters" and we have two delightful sponsors:  Eureka Stamps and Polkadoodles Stamps.  I used an image from Eureka Stamps called "Leaning Cat."  Isn't that smile fantastic?  

     Did you know that next Sunday, August 8, is International Cat Day?  My cats are already planning the biggest party of the year, with cans of tuna and packets of fishy treats included!  lol  While I am truly an animal person, I tend to make many more cat than dog cards and I think it's because they come in such a wide variety of colors.  I know this one is pretty simple in his black fur with pink nose and mouth, but I love coloring calicos and tabby cats!  Who ever saw a calico dog?  lol

     Colored with ProMarkers and white gel pen, then cut with a QuicKutz square die.  The die cut CS piece behind the image was cut with a die from Gina Marie.  The satin ribbons are both from Really Reasonable Ribbon and I added flower/sequin to the hand-tied bow.  I really love how the black and pink color combo worked out.

     What I love most about this card is that everything on it (including the CS on which the image was printed) was put together all from scraps.  Even the flower bit inside the sequin on the bow was a leftover from punched holographic CS!  The bow was tied from a scrap bit of ribbon and the ribbon 'wrap' around the card front was a scrap barely long enough to tuck behind the image piece.  If you notice the pink die cut piece has a flat edge because the scrap wasn't big enough to fill the entire die. 


I used sketch #554 from Sketch Saturday,
turned to better utilize the shape of my image and die cut.
     Challenges:

     I hope your week is going well and that you're looking forward to the weekend.  Hopefully, you'll have lots of "me" time and then you can craft up a card with a cute critter and enter it into our challenge.  :-D  Happy Crafting.  NanaConnie