Showing posts with label Thank You. Show all posts

Friday, October 8, 2021

Sunflower Bucket

      My stash of Thank You cards is getting low and I have a friend who has asked me to make several for her so I'm ramping up production of them.  I'm starting with this lovely sunflower image from Beccy's Place. 

     I used ProMarkers and gel pens to color and highlight the image.  I had merged the sentiment (also from Beccy's Place) before printing.  After coloring, I cut both of them with a QuicKutz square die and then used a Fiskars punch on three of the corners.  I dry embossed some metallic paper and used it behind the punched corners.

     The sparkly ribbons are both from Really Reasonable Ribbon, and I tied the bow using my bow maker.  I think this will make a perfect Autumn themed thank you card.


     Challenges:

     Wishing you the best of days and have a wonderful weekend.  Hope you find lots of "me" time to craft and relax.  Happy Crafting.  NanaConnie

Tuesday, August 17, 2021

A Pretty Calf for a Lovely Thank You

      I noticed the other day that my stash of  Thank You cards was getting pretty low and, just in time, this DOTM showed up from Imagine That!  Along with the sweet calf image, there are sentiments and one of them was perfect for adding to my stash of Thank You cards.  :-D

     I colored with ProMarkers and gel pens, then cut the image with a die from Tattered Lace.  The die is actually made for cutting a shaped card so it has a blank space at the top without any cutting, but after cutting once, I turned the piece in the die and cut a second time so that I had a complete circle.  

     The sentiment is cut with an Unbranded die and the bottom corner of the flocked paper was cut with a Poppy Stamps die.   The corner die also embosses but that doesn't show up very well on the flocked paper.   I used a craft knife to distress the edges of the flocked paper but it's very heavy paper and the distressing doesn't show up very well in the photo.  I didn't want to cover any more of that gorgeous Doodlebug paper so I let the design and the die cuts be their own embellishment.


     Challenges:

     Hope your week is going well and that you can find some 'down time' just for you.  :-D  Happy Crafting.  NanaConnie

Thursday, April 29, 2021

Tea Cup Bunny

      I'm running right up against the deadline in the Digi-of-the-Month progressive challenge at Imagine That! and I'm going to post this as soon as I finish typing the details, before I even add all the links to the other challenges I want to enter.

     This adorable image is the Tea Cup Bunny from the Rosy Tea Party set and the sentiment is part of the set.


Colored w ProMarkers
Cut w Cuts (Kokorosa Studio) die
Inked edges
Mesh ribbon from RRR
Hand-tied bow w pearl

     Challenges:

     Happy Crafting.  NanaConnie 

Friday, April 23, 2021

Cory Mouse with Cosmos Flowers

      Here's another of my DT cards for Conie Fong and this one features Cory Mouse from the Maisy and Cory Mouse bundle.  You can see my card with Maisy Mouse here.  


Colored w ProMarkers
Cut w Die-namics stitched die
Dark blue frame cut w Die-namics die
Aqua frame & background triangle - 'Linen' EF
Signature bow w pearl
Corner pearls

     Challenges:

     Come and play in one of the two challenges at Conie Fong this month.  One is for coloring only and the other is for finished projects.  The themes are always Anything Goes but you do have to use a Conie Fong stamp/digi.  Prizes are Conie Fong images!   Happy Crafting.  NanaConnie

Sunday, January 27, 2019

A Thank You for Di

     I'm sharing a Thank You card today, made specifically to thank Di, who runs the Pixie's Snippets Playground, and it's important to include Parsnip and Dudley in that, too, I suppose, so that they don't feel slighted and run wild.  Di just celebrated the end of the 8th year at the Playground, and she's been running it for the last seven.  Darnell has organized a large blog hop for those of us who wanted to thank her and you can find the hop here if you're interested.


      Following the main rule of the Playground, I did this entire card using scraps of this and that, including a left over bit of CS for the card base.  The flowery background is a snippet of oriental origami paper and the size of it controlled the actual size of the card (approximately 3" X 5".)

     I found a scrap of cornflower blue CS and layered onto it the back of a left-over negative of a "thank you" die cut (Tim Holtz for Sizzix.)  Because the piece between the 't' and the 'h' was missing, I cut a tiny, thin, bit of dark burgundy CS which was hanging about on the desk and used it.  It doesn't match exactly but was the best I could do with what was available.

     The flower was cut from a scrap of white paper; I embossed the petals with a stylus and added a white sequin in the middle.

     I've been a bit absent from the Playground during the holidays (and again most of this month) due to all the time spent with family and the rather long process of sorting things to be relocated.  I have missed making 'snippets' projects during that time.  What fun to have used nothing but snippets for this entire card!  Enjoy, Di, and thank you so much for keeping things going at the Playground.  :-D

     Challenges:
Aud Sentiments
Crafting by Designs
Crafting from the Heart
Crafts Galore Encore
Crafty Creations
Creative Fingers
Digi Choosday
DL.ART Thankful Thurs.
Scrappy Land
TTCRD

     Happy Crafting.  NanaConnie  

Sunday, August 5, 2018

Cat Lover Thank You

     I've done another die cuts card but this one is a special Thank You for a cat lover friend of mine.   Her young daughter has 2 Siamese cats so I did my best to color them appropriately.  I know both of them are going to love this card.


     I used scraps of CS to do the die cuts.  The cat family die is from Cheery Lynn and the Thank You oval was cut with an Unbranded die.  I used ProMarkers to color the gray on the cats and the bit of purple on the ball of yarn.

     I dug in my stash to find one of my hand-sewn bows; it was white but I 'dyed' it with a violet ProMarker.  Once I learned that technique of dying with a marker, I only use white ribbon for my bows.  That way, I get bows which are exactly the color I want.

     I added a small gem to the center before adhering it to the card.

     Challenges:
Crafty Sentiments
Creative Fingers
Die Cuttin' Divas
Digi Choosday
Jo's Scrap Shack
Lil Patch of Crafty Friends
Pixie's Snippets
Quick Quotes
Send a Smile 4 Kids
TTCRD

     That's all I have for today.  Maybe something else tomorrow.  Happy Crafting.  NanaConnie

Wednesday, July 18, 2018

Taking a Bow

     I adore this sweet image (Mo Manning) and this is the first time I've used it as a Thank You card.  I needed one on the spur of the moment and this image was lying on the desk, waiting to be colored.


My colors came from My Favorite Things.


     This time, I 'water' colored with a brush and some of my refill alcohol inks.  I added sparkle gel ink to her tutu and the gems in her hair.  I know it doesn't show up well in the photo but that was the best I could do.  I really did try to get the sparkle to show.  :-D

     I used a Fiskars corner punch on both the image and the piece behind it.  I mounted everything onto a pink card base.  The sheer ribbon was in my scrap stash and I used up what I had left.  Rather than tying a bow since I had such a small piece left after wrapping it around the card front, I simple folded it into a bow shape and added a sparkly flower to the center.  I used ribbon glue to add it to the corner of the image.

     Challenges:
CARDZ TV
Crafting from the Heart
Crafty Catz
Crafty Creations
Creative Fingers
Cute Card Thurs.
DL.ART Thankful Thurs.
Pammie's Inky Pinkies
Southern Girls #2 (ink/stamp/white)
 
     Happy Crafting.  NanaConnie

Tuesday, April 3, 2018

A Tulip Thank You

     I was in need of a quick "Thank You" card and this cute image from Bugaboo Stamps was perfect.  While I was planning it, I looked at the challenge theme from Catch the Bug and it was a recipe challenge: 1 button, 2 images, & 3 layers.


I was inspired by the sketch at Try Stampin' on Tuesday
but I flipped it so that I could use it horizontally.


     When I printed the image, I did it twice on leftover bits of white CS, reversing one of the images as I did it.  The sentiment is part of the image but I cut it off the reversed image so that it was only on the other side.  I colored with ProMarkers and cut one of the images with a simple rectangle die from Spellbinders.  I hand cut the other image so that I could merge it with the other image.

     A tiny bit of the cut off sentiment still showed so I decided that was where I'd put the button.  I search my collection of buttons, looking for a large one.  I laced it with a scrap of jute cord and tied that into a bow.  In my stash, I found the pink and tan, plaid paper and, even though it was only a scrap piece, I knew it would be perfect for the first background layer.  To make the second background layer, I mounted the plaid scrap onto ruby pink CS, and that gave me the 3 layers!  Voila' - fast and easy.

     Challenges:
Butterfly (Twine & Thistle)
Crafty Creations
Crafty Gals Corner
Everybody Art
Lemon Shortbread
Outlawz Twisted Thursday
Pixie's Snippets
Sisterhood of Crafters

     Thanks for visiting.   Feel free to browse around while you're here.  Happy Crafting.  NanaConnie

Monday, January 29, 2018

Flowery Thank You

     I've already shared a few of my post-Christmas, Thank You, cards this month and today I have two more.  This first one will most likely get used this spring or summer.  The image is a stamp from House Mouse and I think it's one of the sweetest and most versatile of all the HM stamps I own.


I used colors from the inspiration photo at Ellen Hutson.

Pin-Sights Color Trend January Purple Haze

     I colored the image with polychromos pencils and blended them with the blender included in the pencil set.  I cut the image and the frame with stitched dies from Cottage Cutz.

     I dug out some royal purple CS and used that on the front of the card base.  I cut the Thank You with a die set from Memory Box.  Memory Box has some really fantastic "Thank You" dies and this one is probably my favorite of all of them.  I like that it's not capitalized and therefore looks more casual and less formal so it works with almost any card design. 

     I wrapped the card front with  black, satin ribbon, then began layering on the sentiment and image pieces.  I left the card very CAS because it will probably have to be mailed.

     Challenges:
As You Like It
Aud Sentiments
Crafting with Friends
Crafty Catz
DL.ART
Polkadoodles


     My second card also uses a House Mouse rubber stamp but this time with a cute bunny rather than a mouse.  It seems to be more of a fall or harvest image with that huge bushel of apples.  It's another one that I've used many times and still love.


     This one is colored with ProMarkers, then cut with an Unbranded die.  I used another die from that same set to cut the mat.  The sentiment was cut with another of my Memory Box dies. 

     This time I kept the white card base and just added more of that same black, satin, ribbon.  I added the sentiment right on top of the ribbon, then added the image piece and mat.  Again, CAS seemed the best design and I really liked the striking contrast of the black ribbon and rich orange colors so didn't want to detract from that with more embellishment.

     Challenges:
A Bit More Time to Craft
Allsorts
Aloha Friday
Artistic Stamper
Colour Crazy
Create and Inspire
Do-Al(l) Kreatives
Send a Smile 4 Kids

     Thanks for stopping by and feel free to browse around while you're here.  There's a pot of coffee on the stove and cookies just out of the oven on the tray right over there.  :-D  Happy Crafting.  NanaConnie

Monday, January 8, 2018

More Thank You Cards

     Continuing with my post-Christmas, Thank You cards, today I want to share one with a sweet and fun image from House Mouse.


     I colored the image with a combination of ProMarkers and polychromos pencils, then cut it with a simple rectangle die from QuicKutz.  The frame piece was cut with a Bo Bunny die.  The "Thank You" sentiment was cut with a die from Die-mensions.

     Challenges:
Color Inspiration Monday
Crafting from the Heart
DL.ART
Dream Valley
House that Stamps Built
Outlawz Greetings
Pammie's Inky Pinkies
Scrappy Land
Word Art Weds.
   
     Have a great start to your new week and Happy Crafting.  NanaConnie

Thursday, January 4, 2018

Post Holiday Thank You Cards

     One of the things about the Christmas holidays and all the gifts is that there is an immediate need for Thank You cards.  I usually start making them during the holidays and this year was no exception.  I made more than a dozen, some of which I shared with family members who needed them.  I'm still making a few more and will post those as they are completed.  In the meantime, here are the first two I finished and mailed.

     First card:


     This one was pretty simple to make; it's nothing more than die cuts, dp, and CS.  The background cut was done with one of my newest die sets from Sue Wilson (Merry Christmas to me!), cut from bleached dp.  The sentiment piece is actually the 'negative' piece left over from cutting out the word "Thanks."  That's a die from Memory Box and I think it looks like a cloud.

     I layered the cuts together, and layered them onto a pink card base which had been embossed with my "Linen" folder.

     Challenges:
Crafting by Designs
Digi Choosday
DL.ART
Everybody Art
TTCRD

     Second card:


     This is another card done all with die cuts but it's a bit more complex.  The card base is another pre-made card and, again, I ran the front of it through my "Linen" embossing folder to give it a bit of texture.  The sentiment is cut with the same Memory Box die as I used above but from different color CS.

     The "quilted" star was cut with my other brand new die (from Stampin' Up) and I know I'm going to have tons of fun with this one!   Talk about versatile - more design combinations than you can imagine.  Great value for the money.

     All of that glittered "paper" is actually cut from 6" x 6" sheets of washi tape.  The sheets have a clear backing paper which peals off to expose the adhesive.  I cut 4 different colors of the glittered washi sheets, then pieced together the shapes to make the star.

     That is my first stack of washi sheets and I plan to order more of them right away!  I can see all  kinds of possibilities for that kind of washi 'tape' and I don't want to run out of it in the first week of using it.  lol

     Challenges:
Crafty Gals Corner
Penny's Paper-Crafty
Scrappy Land
Simon Says Stamp
Word Art Weds.

     That's all I have for today but I am getting back into my routine so I'll probably have a post each day this week.  Happy Crafting.  NanaConnie

Sunday, November 12, 2017

Thankful Mouse

     For several years now, the family Thanksgiving dinner has been at my daughter and son-in-law's home, leaving me free to make one or two desserts which I take along and add to the table, and leaving me free of the massive clean up which always happens after a dozen people have graced your home for a holiday meal.  Do I love it?  You bet I do!

     But I always make a Thank You card (in addition to the Thanksgiving cards which I do for everyone) for my SIL since he's the one who prepares the major portions of the meal.  Here's the one I'm giving him this year.  I guarantee he's going to tell me the card is for a child - and I'm going to remind him that he IS my child, by virtue of having married my daughter, and always will be no matter how old he gets!


I started with the sketch from The Outlawz, but flipped it upside down.


     I used my ProMarkers and polychromos pencils (plus white gel ink for one or two highlights) to color this cute image from Paper Shelter, then cut it and the mat with dies from Sizzix.  I found the very subtle dp for the background in an old Bo Bunny pad and cut it to fit the card front.

     I added a strip of sparkly brown ribbon which had been in my stash for quite a while.  I am pretty sure it came from Really Reasonable Ribbon.  Then I tied a bow using glittery orange ribbon.  It has real glitter on it and that glitter sheds everywhere as you tie the bow!  Sheesh!

     The "Gratitude" and "Oh, Yeah" sentiments were printed, hand-cut, and added on top of the image piece.  The "Thanks" sentiment is hand cut, inked on the edges, and adhered with Pop Dots.

     Challenges:
Addicted to CAS
Allsorts
Crafty Calendar
Creates and Makes
Cuttlebug Mania
Outlawz PAM
Paper Shelter
Ribbon Girl
Simon Says Stamp

     Happy Crafting.  NanaConnie

Monday, July 24, 2017

Flowery Thank You

     I'm playing with some new dies (Die-versions) which arrived while I was off traveling and, since my daughter had to cancel out on our plans for yesterday, I took the opportunity to see what kinds of creativity they would inspire.  What do you think?


     I love bright colors for summer and I love monochromatic bright colors paired up with dark neutrals.  I needed a quick Thank You card and this one came together in about 15 minutes.   The pink flowers are mounted on Pop Dots and the dark background is layered on top of fiber mesh, which is adhered to a white card front.

     Challenges:
Cards in Envy
Come and Get It
Crafty Cardmakers
DL.ART
Everybody Art
Lemon Shortbread
Lil Patch of Crafty Friends
Pixie's Snippets
TTCRD

     Quick card and quicker post today.  Happy Stamping.  NanaConnie

Friday, March 10, 2017

You're a Star !

     I do love Fridays because I get to play with images from QKR Stampede or Eureka Stamps (sister companies) for our weekly challenge at QKR.  Remember, we now have an "Anything Goes" theme every week but we throw in an optional twist if you want to use it.  This week the twist is "Thank You" cards.

     I chose an image I'd not used before, "Full Moon," and I added my own sentiments.


     I used a combo of ProMarkers and Copics to color this image (thinking about my blogging friend, Lynn, and how much she loves blue!), then used a Sue Wilson die to cut it.  I used other dies from that same set to cut the dark blue frame.  Unfortunately, that inlaid frame was the same size as the image piece so I used a new technique - I cut it lengthwise down the middle, spread it apart, and layered the image on top.

    I added the matted sentiment pieces and a small bow (dyed from white to that shade of blue with a ProMarker) and called it finished.  This is going to be used for a grammar school secretary on Secretary's Day next month.

     Challenges:
Classic DT Open
Colour Crazy Craft
Crafty Addicts
Crafty Creations
Dies R Us
Not Just Cards
Scrapper's Delights
Scrapy Land
Stempelsonnen
World Wide DT Open

     Remember, you can use any images you like in our challenges but if you use an image from QKR Stampede or Eureka Stamps, your entry will go into a separate draw for those image users only.  That increases your chances of winning by a huge amount and then you'll have more QKRs for future challenge entries.  It's a win-win all the way around !  Happy Stamping.  NanaConnie
Wednesday, January 25, 2017

Pet Themed Thank You Card

     I'm trying something new for me today.  There's a new challenge group called "Sending Paw Prints" and they are collecting pet themed Thank You cards for animal shelters to use.  The shelters want them blank inside so that they can use them to thank pet adopters, volunteers, or donors.  This is the first card I've done for them but definitely not the last.


     I used an image from Bugaboo Stamps. colored with ProMarkers, hand cut into a rectangle and then framed with a die cut from Bo Bunny.  Because the frame was smaller than my image, I cut it and expanded it both tall and wide.  I used the little negative strips from the die cut to make it seem tied together.  That entire frame was cut from a scrap snippet of blue CS that had been lying on my desk.

     I added two ribbons from my stash and a satin bow, dyed with ProMarker ink.   The sentiment is printed with a computer font.  I kept this very CAS because I really wanted the framed image to be the focus of the card.

     Challenges:
A Gem of a Challenge
Catch the Bug (Bingo diagonal left bottom to right top)
Come and Get It
Glitter n Sparkle
Hiding in My Craft Room
Jo's Scrap Shack
Outlawz CAS
Pixie's Snippets Playground
Sweet Stampin'

     I probably won't have a post for tomorrow but I'll be back on Friday with my regular QKR Stampede post.  If you haven't played along yet this week, be sure to get something done right away.  Remember, QKR is now Anything Goes all the time with an optional twist if you want to use it.  See you there.  Happy Stamping.  NanaConnie

Friday, August 26, 2016

MHK Designer Inspiration Post

     This is my second post today.  If you're looking for my QKR Stampede DT card, click HERE.


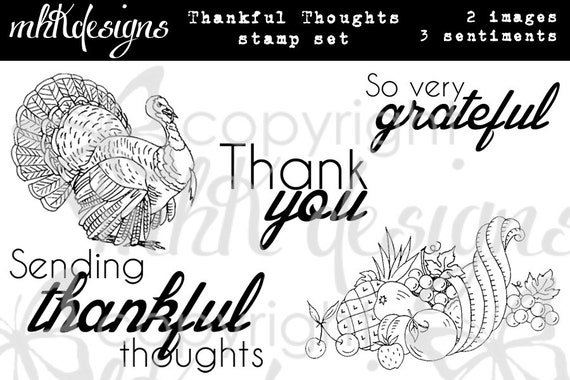
    Well, by now you've had a chance to see all the new releases for this month at MHK Designs and to check out the latest challenge inspiration photo so today I want to give you another way to be inspired by another of the images in the "Thankful Thoughts" set.   I used the cornucopia image last week and now this is the fabulous turkey.  I made a plain Thank You card but it could just as well have been a masculine birthday.  It would definitely make a great Thanksgiving card.


     I wanted to stick with monochromatic, fall neutrals but no matter what I did photographically, all the light browns in the dp turned to rust.  Hmmm, don't know how to correct that so you'll have to trust me that they are more brown and less rust than they look here.

     I colored with polychromos pencils but used ProMarker on his wattle for a deeper color.  I fussy cut the turkey and mounted him on dimensional tape.  I used satin lace to make the bow and the ribbon is velveteen.  The corners are decorated with sequins and pearls.

     Challenges:
Cards in Envy
Crafting from the Heart
Craft Your Passion
Crafty Sentiments
Creative Fingers
Digi Choosday
One Stitch at a Time
Pattie's Creations
Pixie's Crafty Workshop
Robyn's Fetish
Through the Craft Room Door

     I hope we're going to see you playing along in the August/September challenge which runs through until September 20.  Remember, if you use an MHK Designs image, then the theme is Anything Goes and you don't need to use the inspiration photo at all.  :-D  You can find the challenge on the main MHK Designs page by clicking on the tab at the top which says "Current Challenge."

     Happy Stamping.  NanaConnie

Thankful Thoughts Digital Stamp Set

Please continue to leave comments.  The "Word Verification" really isn't on.  BLOGGER INSISTS ON SHOWING THE "CAPTCHA" ICON BUT IF YOU IGNORE IT AND JUST PUBLISH YOUR COMMENT, IT WILL POST JUST FINE.  I WISH I COULD GET RID OF IT BUT THERE'S NO OPTION FOR THAT WHEN THE COMMENTS ARE WRITTEN IN A SEPARATE BOX. SORRY.

Saturday, July 16, 2016

Thanks in Purple and Turquoise

     I've been making lots of Christmas cards this month (having finally gotten a rather late start compared to most years) and that made me think about needing a small stash of Thank You cards as well.  So this morning I've been busy making about a dozen of them because what I don't use myself, I donate to a couple of non-profit organizations who are always in need of Thank You cards to send to their donors and volunteers.

     I chose to share with you the brightest card I made today, since it utilizes a rather neon shade of turquoise for the sentiment and flower.  The card front was made using CS in my favorite color, purple.  I love that purple and turquoise combo; a definite favorite of mine!  :-D


     This is a really wonderfully simple design, showcasing only a die cut sentiment and a hand-colored, flower embellie from my stash.

     Challenges:
Crafting from the Heart
Crafting with Friends
Crafty Addicts
Crafty Calendar
Crafty Creations
Craft Your Passion
Crafty Sentiments
Fab 'n' Funky
Little Claire's
Penny's Paper-Crafty
Pile It On
Through the Craft Room Door

     OK, I'm heading back to the craft room to work on a couple of progressive challenge cards which I want to get done this weekend.  Happy Stamping.  NanaConnie

Please continue to leave comments.  The "Word Verification" really isn't on.  BLOGGER INSISTS ON SHOWING THE "CAPTCHA" ICON BUT IF YOU IGNORE IT AND JUST PUBLISH YOUR COMMENT, IT WILL POST JUST FINE.  I WISH I COULD GET RID OF IT BUT THERE'S NO OPTION FOR THAT WHEN THE COMMENTS ARE WRITTEN IN A SEPARATE BOX.  SORRY.

Wednesday, July 6, 2016

Thank You for Scrapy Land

     I have the most exciting news - I'm a Guest Designer with Scrapy Land for the next 3 months!   They have challenges every fortnight and this is the first one in which I've participated as a GDT.   I've been playing in their challenges regularly for more than two years.

     Scrapy Land has the most incredible collection of die sets created by 40 different makers.  If you're a regular visitor to my blog, you know how I love using die cuts on my cards so I think this is a natural fit for me.

     Our challenge theme this time around is "Anything Goes" but you do need to use a die from one of the companies sold in the Scrapy Land store.   I kept my first card very CAS because I wanted the die cut to be the focus.  I know the cards will get fancier and more complex because I'm already working on the next one, although it's all in my head so far.  Who knows what will happen between now and the time I actually sit down to make it?  :-D


     That lovely green die cut is "Verona Bouquet" by Memory Box.  It worked marvelously by itself against the light green card base but you know how I love all shades of purple so I added some mulberry paper flowers for a bit of dimension and texture.  The sentiment is hand stamped and I added three, small, hand-punched dots to co-ordinate with the colors in the flowers and to bring some attention to the sentiment.

     A completely CAS design which really focuses attention on the bouquet.

     Challenges:
613 Avenue Create
Crafting from the Heart
Craft Your Passion
Fairy Tale
Just Us Girls
Lemon Shortbread
Lil Patch of Crafty Friends
One Stitch at a Time
Simply Papercraft
Take It, Make It

     I hope we're going to see you playing along in our Scrapy Land "Anything Goes" challenge this fortnight.  Dig through your die sets or head over to the store and treat yourself to something new, then come play along.  Happy Stamping (and cutting).  NanaConnie

Memory Box Dies - Verona BouquetMemory Box Verona Bouquet die

Please continue to leave comments.  The "Word Verification" really isn't on.  BLOGGER INSISTS ON SHOWING THE "CAPTCHA" ICON BUT IF YOU IGNORE IT AND JUST PUBLISH YOUR COMMENT, IT WILL POST JUST FINE.  I WISH I COULD GET RID OF IT BUT THERE'S NO OPTION FOR THAT WHEN THE COMMENTS ARE WRITTEN IN A SEPARATE BOX.  SORRY.

Sunday, April 24, 2016

Thanks to the Teachers

     If you follow my blog or even visit regularly, you know that I'm in the process of making 45 "Thank You" cards at the request of my daughter, who is President of the Parent/Teacher group at my grandson's grade school this year.  The 'Parent' side of the group is putting on a recognition luncheon to honor all the teachers on May 6th.

     I've made CAS cards for the parent volunteers to sign and present to the teachers, trying to make each one individual and as different as possible.  I've utilized the various dies I have (from Memory Box, Die-namics, Spellbinders, and die-Mensions) for all the "Thank You" sentiments and then added embellishment to feminize most of the cards and left others as plain as possible for the few male teachers.  We all know how male DNA is programmed to complain about embellishment.  :-D

     Here are some more cards to share with you today.  I've listed the challenges I'm entering underneath each card.

Challenges:

Challenges:

Challenges:

Challenges:

Challenges:

     
     Have a great rest-of-your-weekend and Happy Stamping.  NanaConnie

Monday, April 18, 2016

More Thank You Cards

     I'm working on the next batch of Thank You cards for the parent volunteers of the PTC to give to all the teachers at my grandson's school.  My daughter is the group President this year and has asked me to make 45 cards for the luncheon given by the parents to honor all the teachers at the end of the school year.  I finished the first dozen a couple of weeks ago, posted a photo of one of them, forgot to photograph the rest of them before giving them to my daughter, and now I've started on the next batch.

     Here's some of them:


     All are very CAS and each one is done with some kind of die cut.  I used dies from Memory Box, Die-namics, and die-Mensions.  Within the group of teachers there are five men and the rest are women so this time I focused on making sure there were some masculine cards among them.  I had already done two other masculine cards in the earlier batch.

     Future cards can be a bit more feminine but I'll still be using the same die cuts and basic ideas.  Each card will be different but I'll use the same CAS style for all of them.  These are fast and easy to make; the time comes in making all the die cuts and choosing the papers.  But it's a fabulous way to use up lots of those scraps that are living in my bits and pieces basket.  :-D

     Challenges:
2 Creative Chicks
613 Avenue Create
AAA Cards
A Bit More Time to Craft
Amusing Challenge
Crafting with Dragonflies
Crafty Hazelnut's
Lil Patch of Crafty Friends
Petal Lu
Suzy Bee's Blooming

     Happy Stamping.  NanaConnie