Showing posts with label dimensional dots. Show all posts

Wednesday, April 3, 2024

Tulips for a Birthday

      Today I'm using an image from the Progressive Challenge at The Outlawz and I've printed three of them in adjusted sizes.  I colored the tulips with my Sanjoki markers, then fussy cut them with scissors.  I stacked them together and added a few bits of dimensional dots.  The sentiment was printed and cut with an Avery Elle die.

     I found two scraps of CS and embossed each of them with my Linen EF.  I loved the way the tulips took center stage and decided not to add any other embellishments because I didn't want to detract from them.


I was inspired by the sketch at My Favorite Things.

     Challenges:
(The) Crafting ...
Outlawz Tuesday
Triple B

     Happy Crafting.  NanaConnie

Friday, October 6, 2023

Windy Thanksgiving

     Welcome to another Friday and another new challenge at Crafty Catz.  Our themes are always "Anything Goes" but we also offer you the opportunity to use an optional theme, if you want to challenge yourself a bit more.  Our option this week is "Colors of Autumn."

     We're being sponsored by The Paper Shelter and they provided the fabulous set of images and backgrounds for the DT to use, called "Autumn Breeze."  For this card, I used the pre-colored image and background.  I fussy cut the image with scissors, then mounted it onto dimensional dots before layering it onto the background.  The sentiment was printed and fussy cut and I also added dimension to it.  I love the visual texture the dimension creates.


     Challenges:
Sweet Sketch Weds (#264 Scene)

     Happy Crafting.  NanaConnie

Sunday, July 23, 2023

Too Much Santa

      In another week, July will be gone and we'll be looking August squarely in the face.  Where did the first half of this year go?  I don't seem to remember much between May and July!  It's escaping far too quickly.  

      But with a week left, I'm doubling down on "Christmas in July" and getting a few more cards done for my stash.  I counted the other day and I have nearly 30 already finished, which feels like a good start on the hundred or so I make each year.  I use about 20 for family and friends, then the rest get donated to a local Senior Center.  The seniors there don't have access to the local Hallmark store and it's hard for them to get out and purchase Christmas cards for their own children and grandchildren so they really appreciate having access to the donated cards.

     The image and sentiment I used today were in a folder of Christmas images which I printed last year, awaiting coloring.  Unfortunately, I didn't note the name of the company or artist so I don't know who should get credit.  If you recognize it, please let me know.  I really want to acknowledge the artist.

     I colored this using my Sanjoki markers, highlighted with a white gel pen, then cut it with a die from QuicKutz.  I matted it with black CS and trimmed that close with my paper trimmer.  The sentiment was cut with a Tonic Studios die and also matted in black.  I used dimensional dots to mount the sentiment.

     The background dp came from my oldest stack of Christmas/Winter paper and it's from DCWV.


     Challenges:

      Wishing you all a fabulous Christmas in July and Happy Crafting!  NanaConnie

Tuesday, July 4, 2023

4th of July - Independence Day !

      Happy 4th to all my American friends!  

    It's Independence Day in the USA and in my town, we're celebrating with BBQ hot dogs, hamburgers, a visit to the Museum of History Revolutionary War exhibit, a parade, and fireworks once the sky gets dark.

     My youngest granddaughter isn't home this summer because she's taking a full load of summer classes at her university, along with participating in a summer internship.  Because she's out of state, we put together a "care package" box for her to open today.  My other granddaughter (her older sister) decided the box should have a theme like the other boxes we sent to her during the school year (i.e. Exams, Valentines, St. Patrick's, etc.) and the theme became Red, White, and Moo - in honor of the silly 'Counting Cows' game, originally used to lessen the boredom of long drives back and forth between California and Texas when she was moving at the beginning of the academic year.

     Of course, as with each box, my job was to make a card to go in it and my daughter picked out the cow image for me.  The cow was pre-colored but I added highlights to it using gel pens and polychromos pencils.  The sentiment had to be the theme, and I cut the image piece with an oval die from QuicKutz.

     I found the fireworks for the background in a digital stamp set by Jan's Digi Stamps called Independence Day Friends.  There were two separate images, one red and the other blue, which I merged together after reversing one of them.  I sized them before printing so that they would fill the entire background.

     I chose scraps of red and blue CS to make the card front, added the panel of fireworks, and then mounted the image onto dimensional dots before applying it over the fireworks.  I love the way it turned out!  :-D


     Challenges:

     That's it for today.  Be safe and sane with all your celebrations.  Happy Crafting.  NanaConnie

Wednesday, April 12, 2023

Singing in the (April) Shower

      Today I was inspired to dig into the House Mouse stash and I came up with this stamp which I've probably used a million times over the years!  To say it's a favorite of mine is to understate the obvious.  :-D

     I thought it would be fun to go back and use a technique I like but haven't used in quite a while, called a "Spotlight."  As you can see, it involves stamping or printing an image twice, then coloring only a portion of the image and cutting it with a die (or scissors, if you have a steady hand.)  I used a simple circle die from QuicKutz this time but I've done squares, rectangles, scalloped edges; all sorts of options are available depending on your own preferences.

     I used my ProMarkers to color the 'spotlight' image, and used a coffee brown ink pad to ink the edges.  I stamped the background image with a Stone Gray ink pad and colored it with 3 shades of gray alcohol markers because the stamp looked so plain in just it's 'native' state.  I cut the gray image with a die from CUTplorations and inked the edges of it.

     I mounted the spotlight image onto Pop Dots and carefully lined it up with the gray background image and, voila' - a Spotlight card!  I printed and cut the sentiment using a die from Avery Elle, inking the edges of it before applying it to the upper corner of the card.  A fun technique for focusing attention but really quite a CAS design without any embellishment aside from the faux stitching of the die.


     Challenges:

      That's it for today but I've been on a coloring binge with Mariola Budek images so you may see another card or two featuring her images in the next couple of days.  Then, on the 14th, a new challenge starts over at FarmQuest and I'll be posting a DT card for that one, plus I have NEWS !! on Friday so be sure to come by then.  :-D

     Happy Crafting.  NanaConnie   

Sunday, April 2, 2023

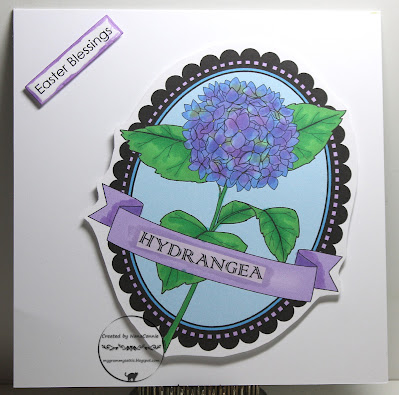
Hydrangeas

      This beautiful image of a hydrangea came from Beccy's Place and, though I've used it before, it's one of my favorite spring flowers so it gets used a lot.  :-D  

      I colored it with my new Sanjoki markers (I really am loving them!), then fussy cut it.  The Easter sentiment was printed and cut with an Avery Elle die.  I mounted both the image and the sentiment on dimensional dots for a little bit of visual interest but beyond that, this is a very CAS design.


     Challenges:
Dragonfly Dreams

     I'm a bit under the weather today so this is the only post I'll have but tomorrow should be a better day a nd we'll hope for two posts then.  Happy Crafting.  NanaConnie
Friday, January 6, 2023

Hedgehog's Love Letter

      Yesterday, I promised to post the second card, with another Penny Black hedgie image, made for the moms of college kids to ship off in the "care package" boxes with a Valentine theme.   I think this little guy is even cuter than the one yesterday (which you can find by scrolling down one post.)  The hedgies are new stamps for me, and I have another 3 which I'll be sharing through the month of January.

     On this one, also water colored, I used QuicKutz dies to cut the image and the paper frame, then added a glitter paper strip from the scrap basket.  The image is mounted on dimensional dots.  The sentiment was printed and cut with an Avery Elle die, and the edges were inked to make it stand out from the white card front.


     Challenges:

     Happy Crafting.  NanaConnie

Friday, October 7, 2022

Ghostly Halloween

      Over at the Outlawz Progressive Challenge this month, we were given a Ghost image from Oddball Art and, at first, I envisioned a very CAS card featuring just the ghost against a dark background.  But, as you can see, my creative muse led me off that path onto something completely different.  :-D

     I used ProMarkers to color the cute ghost, then fussy cut it with scissors.  I pulled paper scraps from the Halloween box, cut strips from 3 of them, and used those for the background.  I also gathered up all my scraps of black CS to start cutting the various bits and pieces which make up the overall Halloween scene.

     The tree was cut with a die from Die-Versions.  The haunted house was cut with a Cuts die, and the large bat above the tree was cut with an Impression Obsession die.  The sentiment was printed and cut with an Avery Elle die.  The ghost was popped up on dimensional dots and tucked into the house to look like he was rising from one of the upstairs rooms.

     Finally, I added one of my hand-sewn, signature bows with a pearl.


This is also my Day 7 entry into the 

     Challenges:

     Happy Crafting.  NanaConnie

Tuesday, August 23, 2022

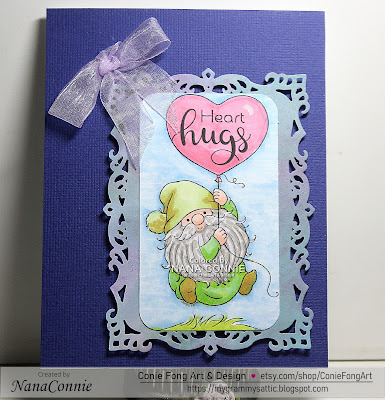
Heart Hugs

      Today I'm sharing another DT card done using a sweet Conie Fong gnome, this one with a heart shaped balloon.  The set of images and sentiments is called "Gnome with Balloon" and he comes with both a round balloon and a heart balloon, with or without the grass at the bottom, plus 5 sentiment options.  I think he's adorable and very versatile; think birthday, Valentine, anniversary, or like I'm doing, just a simple "Miss You" card for someone who recently moved out of state.

     I merged the sentiment onto the balloon before printing.  I used my ProMarkers to color the image, then cut it with a QuicKutz die, and punched the corner with a Fiskars punch.  I cut the frame shape out of an old scrap of water colored paper I had done for another project, using a fancy die from Spellbinders.  I dry embossed the dark blue background piece with my 'Linen' EF and added it to the card front before layering on the image piece (dimensional dots) and adding the hand-tied bow.


     Challenges:

     I hope we're going to see you  playing in our challenges over on our Facebook site.  The August Challenge is combined with our September challenge so you have plenty of time to find that perfect Conie Fong image you want to use and get something made.  There are also some wonderful freebies available if you don't yet have any Conie Fong images. You're going to fall in love with Conie's darling images!  

     Happy Crafting.  NanaConnie

Wednesday, February 2, 2022

Heart full of Love

     We're starting our new monthly challenge at Paper Funday today and our theme is always "Anything Goes" with the optional twist for February being "Hugs & Kisses."  Our fun and fabulous sponsors are Polkadoodles and All Dressed Up.  I am using an image from Polkadoodles called "Love You Bunches."

     I used my ProMarkers to color the sweet bunny image, then fussy cut it with scissors.  I used a circle die from Dare 2B Artzy to cut a circle in silver glitter CS and layered a scrap of  pink dp behind it.  I mounted the image onto dimensional dots and put that in the circle.  The sentiment was printed, cut with an Avery Elle die, and matted with another scrap of the pink dp.  Sparkly and fun but still pretty CAS.


     Challenges:
Butterfly (circle, coral, cardinal + butterflies)

    Come play with us in our February challenge.  You are free to do Anything Goes or to follow the option of Hugs and Kisses, but either way,. we'd love to see you entering our challenge.  Happy Crafting.  NanaConnie

Tuesday, November 9, 2021

Is This Dasher? Dancer? Donder?

      Today I have another card for the 30 Days of Holidays at Beccy's Place and I'm showcasing the letter "D."  On this one we have: Dasher (or maybe Dancer or Donder; I can't tell them apart!), Die cuts, Digi image (from Beccy's), Dry embossing, Dimension, & Deep Red (did I forget Deer?)

     The reindeer is colored with ProMarkers and gel inks, than cut with a die from CUTplorations.  The deep red frame is also cut with one of the dies from that set, then dry embossed with my 'Linen' folder.  I used scraps of dp from Graphic 45 and matted each of them with deep red CS.  The sentiment was printed and cut with an Avery Elle die.  The image is mounted onto dimensional dots before adding it to the card front.


     Challenges:

     Happy Crafting.  NanaConnie  

Wednesday, May 26, 2021

Walking the Pug

      My "third" granddaughter, more or less adopted by the entire family when she became a room mate to my eldest granddaughter, has the cutest "ugly" pug dog in the whole world, named Eva.  When I ran across this image at Wink Wink Ink (I was lucky enough to win a challenge they sponsored), I grabbed it immediately and here's what I did with it.

     I had just finished my first "Hat" easel card (see this post) and I guess my mind was still on doing easels because before I realized it, I was doing a second easel card this morning.


Colored w pencils and ProMarkers
Image is fussy cut w scissors
Brown doily cut w QuicKutz die
Circle cut w QuicKutz die
Image mounted on dimensional dots
Paper from Recollections stack
Sentiment mounted on dimensional dots
Easel is an A2 card folded lengthwise

     Challenges:

     Thanks for stopping by and I hope you've enjoyed your visit.  Happy Crafting.  NanaConnie