Showing posts with label gold paint pen. Show all posts

Wednesday, August 7, 2024

I Know, I Know !

      Time for another challenge at FarmQuest General Store where our theme is always "Anything Goes" and where we are always sponsored by QKR Stampede.  The prize is always the three QKR images used by the DT for their inspiration cards, and you can be certain they are cute, cute, cute.  Occasionally, we are given realistic animal images and even those are 'cute' in their own way.  

     Be sure to check out the main challenge blog to see all the images we used this month.

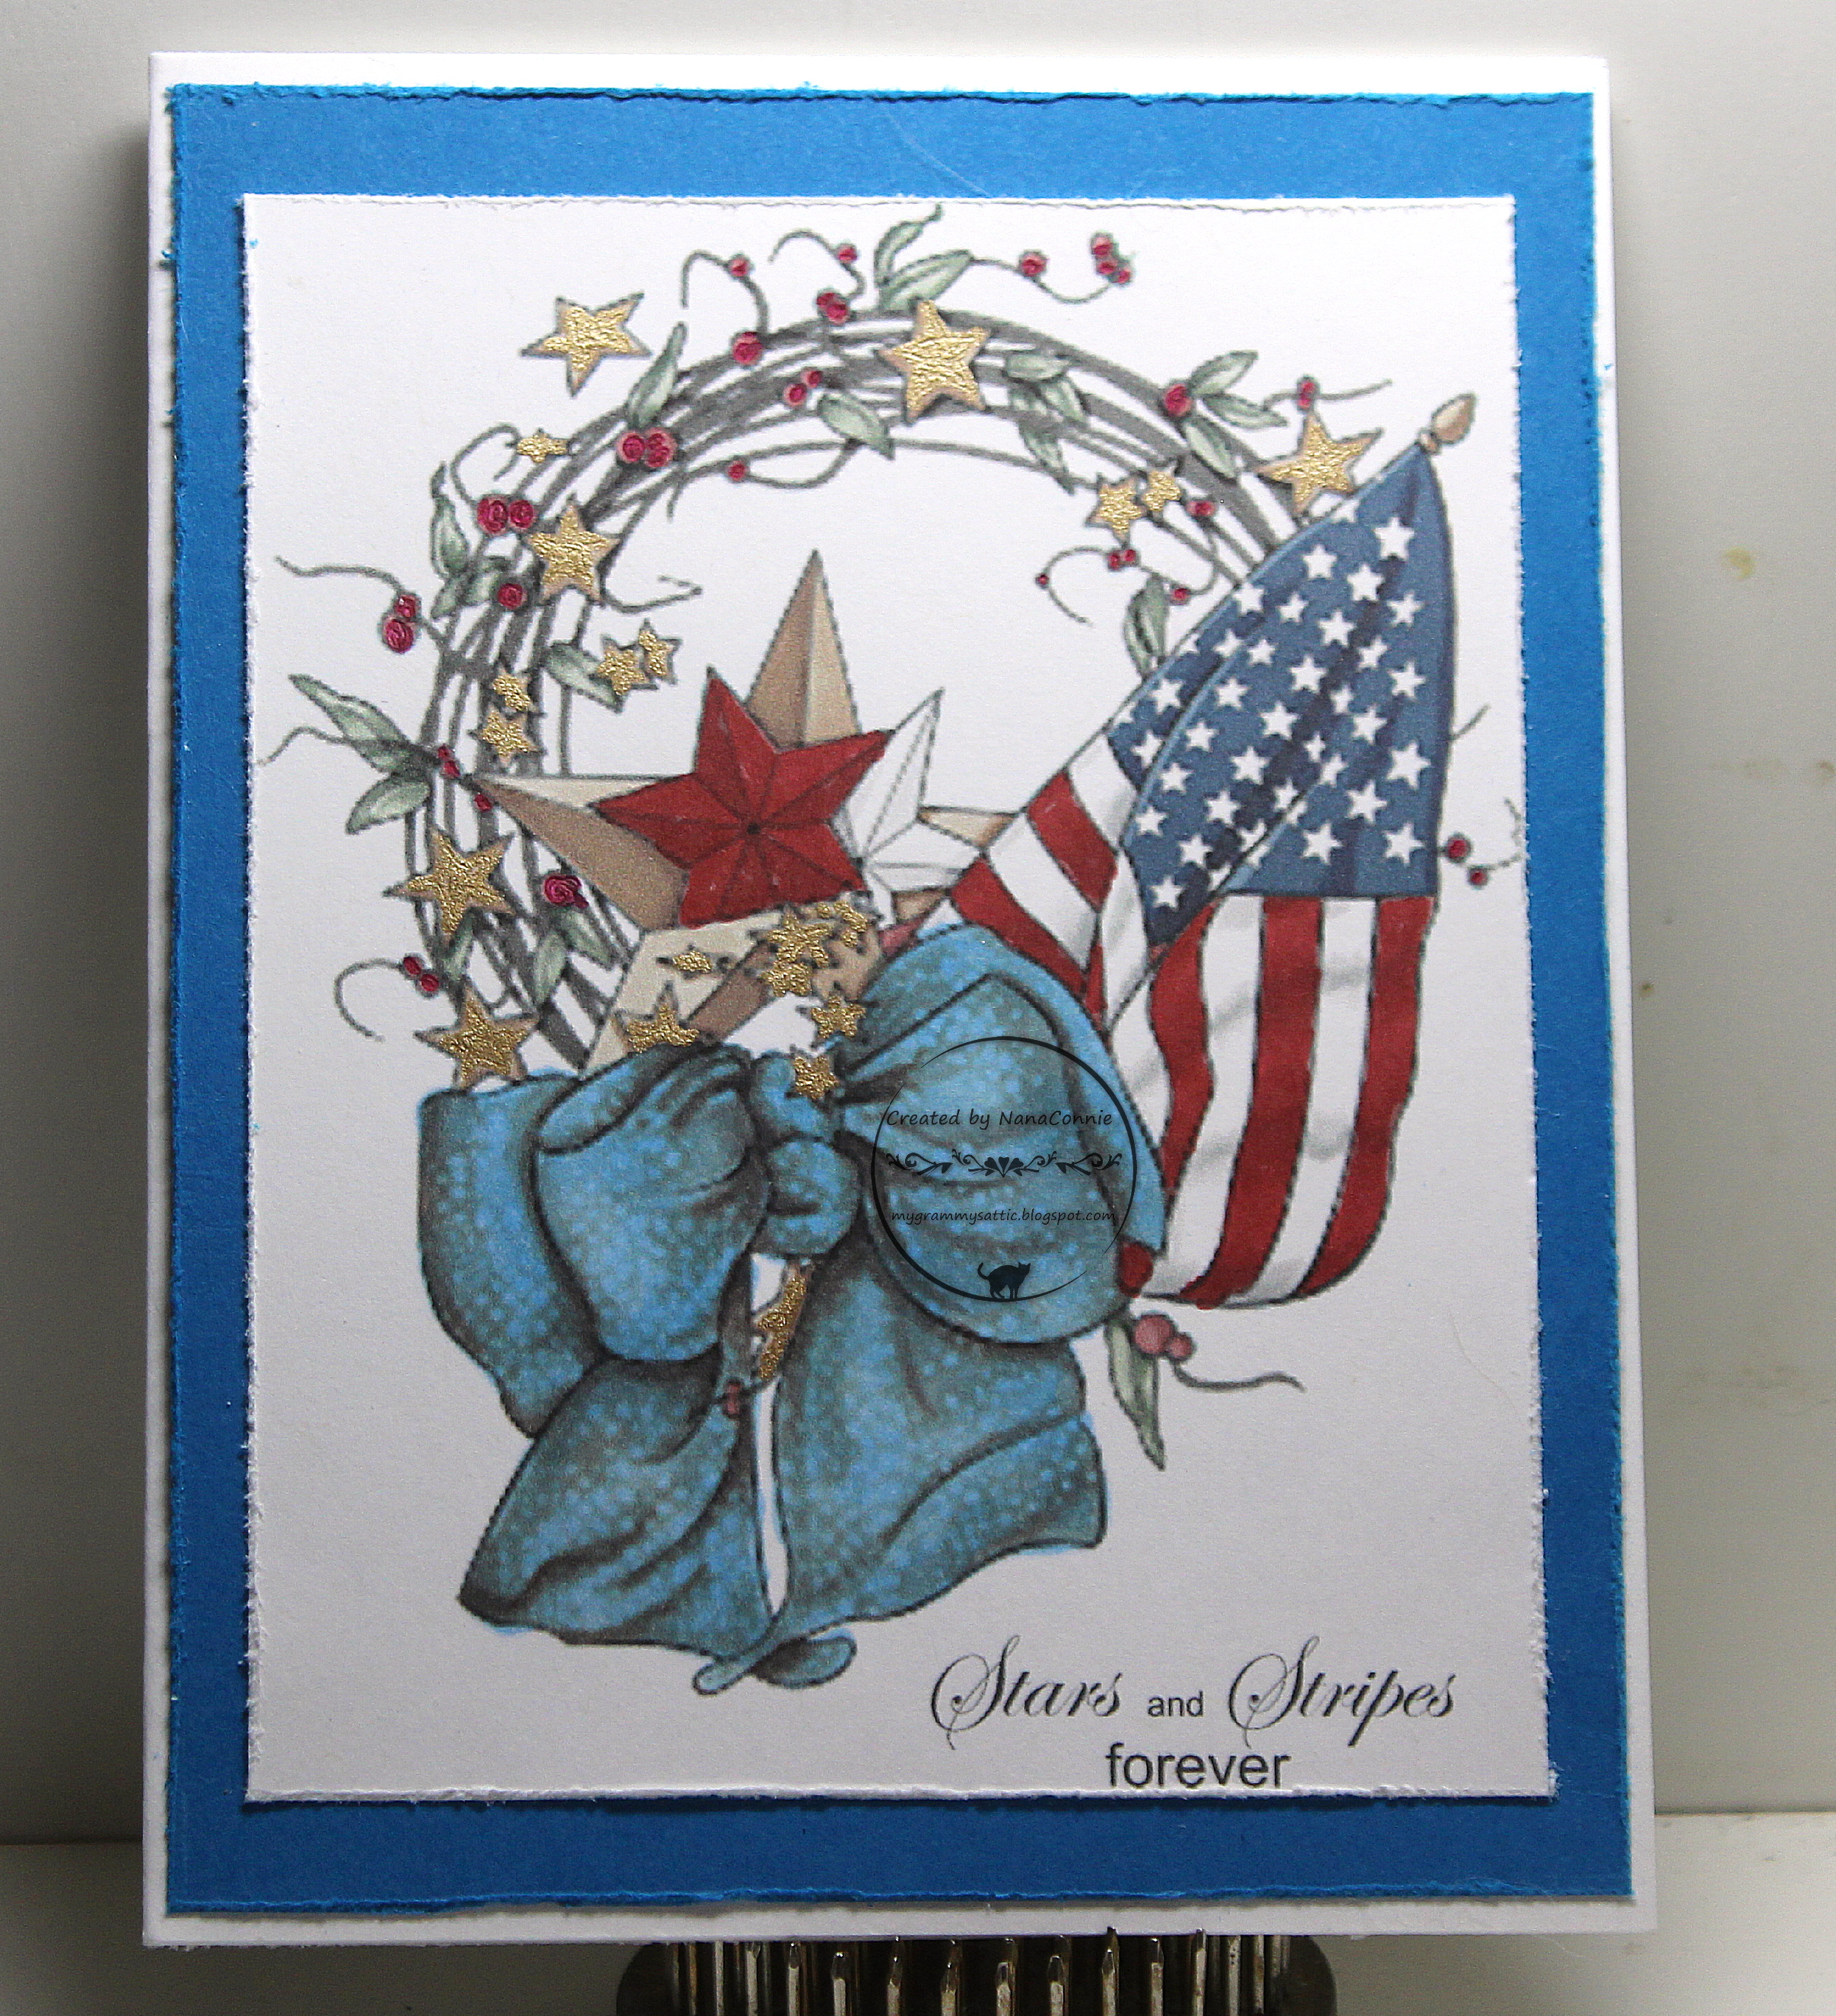
     I chose the image called "Got the Answer" and colored it with ProMarkers and gold paint pen.  I cut the image with an old Spellbinders rectangle die.  I sorted through my scrap basket and found two patterned papers which I trimmed to size, plus a scrap of purple CS, then I layered all those together with the image.  I printed and cut the sentiment with an Avery Elle die, and layered it onto the purple scrap.  I thought the plaid and the old sheet music added an extra bit of country flair.


      Challenges:

     Come play with us this month, won't you?  We love being inspired by you and what you make.  Happy Crafting.   NanaConnie

Monday, March 18, 2024

March of the Viking !

      Time for the Outlaw Progressive Challenge again and this month there's a cute little Viking image.  I have to tell you that I wasn't exactly 'madly in love' with this Viking when I first saw him but there were two images available this month, this one and a female Viking (Vikingess?)   I debated between the two of them but finally decided on the male image because I needed a masculine birthday card.  Once I got him colored up, I was totally mad about him!  He seemed to come to life with a bit of color and sparkle.  lol

     I started by coloring him with Sanjoki markers and glitter gel pens, then added tiny bits of gold paint pen to his helmet and shield.  I used gold paint pen on the sentiment stamp but it didn't transfer onto the card stock very well, so I wrote over it with the pen.  Both the image and the sentiment were cut with Tonic Studios dies, and the edges were inked with black felt marker.

     The background paper came from a Recollections stack (which is at least 5 years old and I'm slowly working my way through it since it has some really terrific, masculine prints.)  No embellishment needed.  I forgot to photograph the inside before I mailed the card but it says, "The years are marching on.  Better run!"

    
     Challenges:

     Happy Crafting.  NanaConnie

Wednesday, November 29, 2023

Santa's on the Way

      I'm finally getting around to posting my card which uses the background image provided by The Outlawz Progressive Challenge for November.  I'm usually earlier getting it done but this month just got way from me.  In any case, the starry background was the freebie image this time.

     I colored the Santa image with my newest markers from Altenew which I bought with a challenge prize gift card and I do like them.  I added white gel pen to the snowflakes and used a silver glitter gel pen on Santa's tassel.  I'd never tried the Altenew markers before but I'm sure I'll purchase additional colors in the future.   The nice part about them is that they are refillable.

     The image was cut with a QuicKutz die after printing the sentiment on top of it.  I printed the star background and colored the stars with gold paint pen and added some blue, white, and silver with gel pens.  Everything was layered onto a metallic, gold card base.


     Challenges:


     Thanks for visiting and Happy Crafting.  NanaConnie

Sunday, July 30, 2023

Nativity Cards

      I have two more Christmas cards to share with you this morning.  I hadn't really intended to make any more Christmas cards this month but I happened to get a new, Crafter's Companion, double die I had ordered and, since I've never had one of those before, I had to try it out right away.

     The die is made to cut two layers of CS at the same time, which then can be used on one card.  I used two shades of brown CS for the cuts, then layered them together.  I had already run them through my Cuttlebug using my Linen EF before cutting.  

     I chose some blue, glitter CS for the background, and I think it made a delightful night sky.  The 'star' is also part of the die (as you'll see on the second card.)  I used a gold paint pen on the star before adding it to the sky, and also used it on the cut outs of Mary and Joseph.  I saved the cut out pieces for yet another project.  The sentiment is from QKR Stampede and I fussy cut it.


     Being a frugal crafter, I simply couldn't bear to toss out the leftover negatives from the original die cutting, so I made a second card, layering the two pieces together after reversing the one which had the 'negative' star.  This time I used the two shades of brown CS, plus a bottom layer of cream CS. 

     I found a scrap of lavender CS for the background.  I added some sparkle to the star by coloring the space with a Sakura glitter pen.  The "Merry Christmas" sentiment is from Eureka Stamps, printed and fussy cut.


     Challenges:
Christmas Crafts ... (7 palm trees)

     Happy Stamping (and die cutting!)  NanaConnie  

Friday, July 7, 2023

North Pole Express

     Welcome to my blog.  So good to see you visiting today.  It's Friday so that mean another challenge has begun at Crafty Catz  where our theme is always "Anything Goes" but with an OPTIONAL twist.  This week the twist is to use more than 1 fold.  Our sponsor is Last Minute Miranda.  They supplied image for the DT to use and I chose the one called "North Pole Express."

     I did a Gate Fold card and used three of the images which came with the set.  I started by coloring the images with by Sanjoki markers and a gold paint pen, then added highlights with a white gel pen.  I cut the three images using either QuicKutz dies (outside images) or a die from Tonic Studios (inside image.)  The sentiment was cut with an Avery Elle die.  I cut plain red CS to mat the images and sentiment.

Card front

Inside

     Challenges:

     This is my second post today and if you scroll down, you'll see the first one.  I'll be posting the third one later today so come back and see it, too.

     I hope you'll be inspired to make something and come enter it into our challenge.  If you get truly inspired, make a card with more than 1 fold but if not, Anything Goes is perfectly fine.  Happy Crafting.  NanaConnie

Monday, June 19, 2023

Patriotism

      Our greatest National holiday in the US is undoubtedly July 4th, Independence Day, (right around the corner!) but the image I used on this card would work for Memorial Day, Veteran's Day, even Labor Day, I suppose.  The image and the sentiment come from a Jan's Digi Stamps set called "Star Spangled Wreath" and it was a delight to color.  It also happens to be on sale right now.  :-D

     I used Sanjoki markers and a gold paint pen to color a gray scale image, then cut it with a QuicKutz die.  I 'distressed' the edges with a craft knife and layered it onto a blue CS rectangle, also distressed along the edges.  The image itself was so beautifully detailed that I didn't want anything to distract from it so no embellishments of any kind.


     Challenges:
Double Trouble (summer, red, blue, gold)

     Wednesday will mark the official first day of summer in the Northern Hemisphere and trips to the beach, family and friends around the BBQ, the rising heat can't be far behind.  So unpack your shorts and swimsuits, grab your flip flops, and get ready!  If you're not traveling, then head for the craft room and Happy Crafting.  NanaConnie 

Sunday, December 11, 2022

Nativity in Kraft

     My sweet daughter bought me another new die this year, also from DIY Scrapbooking, and I wanted to test it right away, right out of the package.  I was siting at my craft desk and the closest paper to me was a scrap of kraft CS so I grabbed it and ran it through the Big Shot.  I really had no intention of using the cut but when I tossed it aside, it landed on some black CS and the design just popped!

     Next thing I knew, I was trimming the black CS to size, gluing down the Nativity, and coloring the star with gold paint pen.  I made a square card from kraft CS and cut the sentiment from cream colored, sparkly CS, using a die from Die-Versions.  This made a really CAS card which looks far more complex than it is.

     Not exactly traditional Christmas colors but I love the end result !


     Challenges:

     Happy Crafting.  NanaConnie

Tuesday, November 8, 2022

Turkey Day

      Welcome to my next DT post for Through the Craft Room Door!  Our challenge themes are always "Anything Goes" and they now run for 2 weeks at a time.  This time, our sponsor is Eureka Stamps, sold by Stamp on It!  I chose this really fun, scribble drawing, called "Double Line Turkey." 

      I printed the digital image onto kraft paper, then colored with a black ProMarker and a white gel pen.  I highlighted between the double lines with a gold paint pen.  I used an octagon die from QuicKutz to cut the image and I inked the edges with another ProMarker.  I found a scrap of DCWV dp and layered it on top of a piece of brown CS.  I used sheer ribbon from Really Reasonable Ribbon to wrap the card front and to tie the multi-loop bow.


     Challenges:

     I hope you'll come and play in our challenge this fortnight.  Remember, Anything Goes so you have no excuse not to join.  Happy Crafting.  NanaConnie

30 Days of Holidays - Day "G"

      I'm still playing in the 30 Days of Holidays at Beccy's Place.  Another Thanksgiving card for today and I followed another of Beccy's tutorials, this time for a Gap card.  Other "G"s include: Green, Gel pens, Gnome, Gift, and Gold buckles.

     I colored this Beccy's image with ProMarkers and gel pens, plus a gold paint pen on his buckles, then cut it with a Tonic Studios die and rounded the corners with a Uchida punch.  I cut the gap in the card front and then used scraps of wood grain CS from DCWV on each side of the gap.  I know that traditionally these cards are held together with letters of words bridging the gap but I chose to bridge it with the image and the sentiment piece.

     I added green CS to the inside of the card and lightly embossed it with my Linen EF.  I wanted the green to match the gnome's clothing.  The sentiment was cut with an Avery Elle die.  I left it without embellishment because I'm going to use it as a masculine Thanksgiving card.


     Challenges:

     Have a great day and Happy Crafting.  NanaConnie

Wednesday, October 19, 2022

Broom and Caldron

      The image I used today is another one of those which was exchanged in my group of crafters and I think it was done with a stencil but it may have been a silhouette rubber stamp.  I thought it was fun and fabulous so I did a bit of coloring with ProMarkers, then used gold paint pen on the witch's hat and sparkle gel pen on the cauldron handle and rim.

     The image was cut with a Sue Wilson die and the sentiment was printed and cut with an Avery Elle die.  The background paper is from Taylor Made.


Wednesday, December 18, 2019

Tic Tac Toe at Catch the Bug Critter Chaos

     Now we have a Tic Tac Toe board for the theme at Catch the Bug's Critter Chaos challenges.  Here's the board and I used the diagonal from bottom left to top right - Tree/Free/Ribbon.  The image is from Bugaboo Stamps, of course and I used the sketch from Outlawz, but I flipped it side to side.


My card:

Colored with ProMarkers
Stickles added to hat 'fur' & star on tree
Gold and silver paint pens used on ornaments
Sizzix and QuicKutz dies
Hand tied, polka dot bow
Gold sparkly ribbon

     Challenges:
ABC Christmas
Crafty Gals Corner
Creative Inspirations
Ellibelle's Crafty Weds.
Mod Squad
Scrappy Land
Word Art Weds.
Words to Craft By

     Happy Crafting.  NanaConnie

Monday, August 13, 2018

Peacock

     I'm sharing a card this morning which was the result of my daughter challenging me to CASE a photo she found on the internet.  It was this picture of a beautiful peacock.


     Now, what you need to know is that I love peacocks but coloring them is something that intimidates me.  I don't think she knows that or she probably wouldn't have challenged me to CASE that one.  But we can't disappoint our children, so...

     I searched my files for a peacock image but the only two I had were pre-colored and I felt that wouldn't fit what she wanted to see from me.  I haven't collected many peacock images just because coloring them intimidates me.  However, I did find an embroidery pattern which I scanned and reduced to make it feel a bit like a digi image.  I've never tried coloring embroidery patterns before although I've embroidered my share of them with embroidery floss.  :-D  Here's what it looks like after I scanned it.


     And here's what I did with it.


     I colored with ProMarkers, adding super fine glitter to the head and neck and using gold paint pen on the lattice work.   I also used gold paint on the edges of the image after die cutting it with a rectangle die from Tonic Studios.  I'm thinking that I might like to try coloring this one again but using my polychromos pencils.  I'm sure it will give a very different look to that magnificent bird.

     I knew I wanted to bring out the main colors in the peacock so I used another Tonic Studios rectangle die to cut scraps of turquoise and green CS.  I put those together on an angle, then layered on the image.  I chose a purple CS scrap to make the card front and added a scrap of lace to it before adding the image.

     I added the sentiment but did not embellish the card because I didn't want anything to distract from the peacock.

     Challenges:
Cards in Envy
Crafter's Castle
Crafty Friends
Creates and Makes
Hiding in My Craft Room
Incy Wincy
Jo's Scrap Shack
Pile It On
Send a Smile 4 Kids
Stamping Sensations

     I rather like my first attempt at coloring a peacock and I'm proud enough of it to share it on my blog.  I did send a photo of it to my daughter as soon as it was finished (rather than making her wait until she came over or we had coffee together) and she pronounced it "Beautiful!"  lol

     Happy Crafting.  NanaConnie