Showing posts with label Vellum. Show all posts

Saturday, January 14, 2023

Cowboy Owl

     This card is doing double duty so you're going to see it today as my DT card for the FarmQuest challenge, where our theme for this challenge is Cowboy Boots, Spurs, or Hats.  Then, it'll serve as my  DT card tomorrow for QKR Stampede.  The image is from QKR and it's called "Cowboy digital stamp" and over there we always have an Anything Goes theme.

     I colored the image using my watercolor paints, and added highlights with gel pens.  The image and the frame were both cut with Cuts stitched dies.  The background paper is actually vellum and it just worked so well with my colors in the image.  The sentiment was printed and cut with an Avery Elle die.  I love this crazy owl all dressed in his cowboy garb.  lol


     Challenges:

     Be sure to visit both of the challenges and we hope you'll come and play along with us.  Happy Crafting.  NanaConnie

Wednesday, June 9, 2021

Home, Sweet Haunted Home

      From Spring to Halloween in just one day!  lol  I told you back in April that I was going to  play each month in the Two Old Bats challenge where they give us a Mood Board for inspiration but the actual theme is just "Halloween."  This month, the mood board had lots of witch-related pics and here's my take.

     I stamped the silhouette onto vellum, then colored the scene from the back (using Promarkers.)  I cut the image with a QuicKutz die and inked the edges with a black ink pad to cover the 'white' lines that appear when vellum is cut.  

     The black frame was cut with a Spellbinders die.  I used my 'Linen' EF on orange CS and mounted that to the card front.  A really simple card but looking much fancier because of the frame.  


     Challenges:

     I love making Halloween cards and as I get new great-grand kids (2 expected this year!) it means mailing more cards each year since I still mail them to my kids, and all my grandkids as well.  So, making one Halloween card each month means that I don't have to do them all at once 3 days  before Halloween.  :-D  Kind of like working on the Christmas stash all year long.  Which reminds me, I haven't done a single Christmas card yet this year.  Yikes!  

     Happy Crafting.  NanaConnie    

Sunday, August 2, 2020

A Quilt for Encouragement

     One of my dearest blogging friends is taking a break from card making and blogging while she does other things including making her first ever quilt!  I'm so excited for her and, remembering back to my "first quilt" days, I wanted to share a bit of encouragement and kindness with a dear friend.

     My first quilt was anything but perfect because I made the mistake of assuming that because I'd been sewing since my childhood days, I could certainly quilt!

     Little did I know how much I had to learn about exact measurements - not just in cutting but in seam allowances and layouts.  When the instructions say 3/8 inch seam, it means 3/8 inch exactly, without variation anywhere along it.  And you never, under ANY circumstances, decide on a quilt pattern that has curves for your first ever quilt!  lol  My first attempt was taken apart so many times, the pieces were worn out before it ever got fully put together.  I personally tossed it into the dust bin, disgusted but still determined to conquer the craft.  :-D

     Anyway, here's the card I sent her.  Her favorite color is blue, obviously.  The image is from Art Impressions.


Image is on vellum
Image mounted onto white CS
     & cut w/ Unbranded die
Quilt pieces cut w/ Gina Marie die
Faux stitching from each die
Twine from The Twinery

     Challenges:
Art Impressions
Arty Divas
Crafter's Castle
Crafty Calendar
Crafty Sentiments
Dare 2B Artzy
Dragonfly Dreams
Gem of a Challenge
Lil Patch of ...
Simon Says Stamp

     I hope Lynn shares her quilt on her blog.  There's a wonderful story that goes with it but it's not mine to tell.  Happy Crafting.  NanaConnie

Monday, August 19, 2019

Butterfly Globe

     When I saw this image at Bugaboo Stamps, I fell in love with the peaceful feel of the butterflies in the globe.  Most of us think of globes as being snow globes and, therefore, only for winter but this one was unusual and I immediately wanted to work with it.


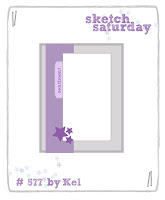
Based on the sketch at Sketch Saturday.


Image printed onto vellum and fussy cut
Colored with ProMarkers
Glitter & Liquid Pearls on globe and butterflies
Scrap dp
"Ocean" CS for card base
Sentiment printed and hand cut

     Challenges:
A Gem of a Challenge
Bastel-Traum
Catch the Bug
Colour Crazy
Creatalicious
Creative Moments
I {heart} ProMarkers
Simon Says Stamp
Stamping Sensations

     That's all I have for today but enjoy your upcoming week.  Happy Crafting.  NanaConnie

Friday, July 12, 2019

Live Out Loud !

     You all know how much I love the weekly challenges at QKR Stampede and working with their images but this "Baby Donkey" image is one of my favorites.  I used it on my DT card this week and am already thinking of other possibilities.


Colored with ProMarkers
Cut with Sue Wilson die
Paper from Linen Closet stack by DCWV
Dots on dp are embossed w/ sparkle EP
Sentiment printed on vellum
Background made with burlap
Sheer ribbon & hand tied bow

     Challenges:
Aud Sentiments (top row)
Colour Crazy
C.R.A.F.T.
Craft-Dee BowZ
Crafting from the Heart
Creative Fingers
Creative Moments
Outlawz Festive Friday
Scribbles Designs
Take It, Make It

     Happy Crafting.  NanaConnie

Wednesday, March 1, 2017

Herding Cats

     Can you believe it's already March?  It feels like just last week we were scurrying around getting Christmas things organized.  Either way, the first day of the month means a new "Anything Goes" challenge over at Crafts Galore Encore and this month our sponsor is the fabulous Fabrika Fantasy!  They very generously supplied images for the DT to use (I adore their fanciful images!) and I was lucky enough to get "Cheerful Elf."

     The image may have been designed as a Christmas Elf but I thought I could turn his hat into a cowboy hat so I used him for this card.  Doesn't he look like he might be herding cats?  Maybe tigers?  Ride 'em Catboy!


     He's colored with ProMarkers, then die cut with a die from Sue Wilson.  I used a piece of vellum, cut it with the same die and overlaid it onto the card front, attaching it with brads.  How long has it been since you dug through your stash of brads?  Yeah, I thought do.  lol

     I added two strips of ribbon and tied the bow with a different ribbon, then left it alone.  I wanted it to be cute and simple (is that related to clean and simple?) and still suitable as a masculine card since I'm sending it to my great-grandson for his birthday.

     Challenges:
Come and Get It
Crafting from the Heart
Crazy Challenge
Creative Moments
Cuttlebug Mania
Glitter n Sparkle
Inky Chicks
Lil Patch of Crafty Friends
Scrapy Land
Word Art Weds.

     That's it for today but I hope you're going to come and play at Crafts Galore Encore this month.  You'll find some really fun and wonderful inspiration from all the team members so check them out.  Then make something and enter it into our challenge.  Happy Stamping.  NanaConnie

Saturday, February 6, 2016

Love in Stained Glass

     I have something really different from my usual 'style' this morning and I had so much fun stepping outside my norm.  No, that doesn't mean I've suddenly become "abnormal" but who knows where it could take me?


I started with the sketch at The Outlawz
although I kept it much more simple.


     The heart is a cling rubber stamp I found somewhere and it's been bouncing around in my collection, new and unused, for more than 5 years (shame on me.)  There's no identification on the stamp so I have no idea who made it.  I stamped it onto vellum with VersaMark ink and used silver EP to heat emboss it.  Then I colored it with my ProMarkers and, what do you know, it looks like stained glass!

     Before I fussy cut it (no easy chore but do-able because of the embossed outline), I put it onto sticker paper and then cut it out.  After it was fussy cut, I peeled off the backside paper and adhered it to the card front.  That meant there was no tape to show through the vellum, something I really dislike and one of the reasons I don't use vellum very often.  Now that I've discovered this technique, I may use it more.

      The smaller roses were stamped directly onto the card front and colored.  You can see how different they look when compared to the the vellum and heat embossing.

     The "Love You" sentiment is cut with a die set from Sizzix.  I didn't want anything to take away from the stained glass heart so I added no embellishment at all.

     Challenges:
AAA Cards
Cards in Envy
Crafting for all Seasons
Crafting from the Heart
Craft Your Passion
Crafty Creations
Creative Moments
Double D
I {heart} ProMarkers
Melonheadz Friends
Mod Squad
Not Just Cards
Paper Girls
Passion for ProMarkers
Simon Says Stamp
Sisterhood of Crafters
Where the HeART Is

     Hope your weekend has started well.  Don't forget that the Super Bowl is tomorrow and if you're not a football fan, watch it for the fab commercials and half-time show.  Enjoy and Happy Stamping.   NanaConnie